2023.06.12
※ 복습
* 웹은 요청하는 것을 다하는 순간 연결이 끊어짐
* 요청(get(양식, 문서) / post(사용자가 입력을 해야하는 경우))
웹클라이언트(웹브라우저) <------> 웹서버(스프링서버)
응답
* post로부터 넘어온 요청정보를 갖는 객체 : request객체
- 브라우저로부터 받은 정보, 양식정보 포함, 이전에 접속했던 정보(쿠키, 세션)
* 요청된 문서를 생성하여 생성된 문서를 보낼때 사용하는 응답정보 : response 객체
- 응답처리코드(200,300,404,500 등)에 따라 클라이언트에게 전달
GET : 앵커태그, 주소에 내용을 첨부하는 방식
POST : 데이터추가, 변경된 데이터 첨부할때
80포트 - 기본포트
443포트 - 암호화 보안 프로토콜
-> 포트번호가 겹치면 안되니까 was는 9000 사용
● 실습
▶ 회원가입 폼 만들기
- 응답 처리에 jsp활용
- 보통(예전)은 서블릿으로 했음(확장자 없음)
1. 웹클라이언트
1) 시작페이지 요청(index.html-순수 웹서버/index.jsp-응용웹서버was)
http://localhost/포트번호
2) a태그인 form 링크 클릭
- 위의 응답 내용중<aform.html> 요청</a>
http://localhost/포트번호/from.html
3) 양식을 채워서 서버로 요청
- 위의 문서는 양식 내용이므로 양식작성(양식의 내용을 form action form.jsp로 요청)
2. 웹서버(was-웹 + 어플리케이션) - 톰캣
1) 시작페이지는 정적페이지이므로 웹서버 기능으로 작동 가능
index.html
<a>회원등록</a>
<a href = form.html 같은경로(uri 상대경로) >
2) form.html 정적 문서 찾아 리턴(웹서버 기능)
3) 양식을 처리하여 그 데이터 결과 리턴
- form양식 정보를 request객체로부터 추출
- 이 리퀘스트 객체 내용을 바탕으로 데이터 처리
- 데이터 처리 내용을 response객체에 담아 웹 클라이언트로 전송
▷ 다이나믹 웹프로젝트 만들기
* webapp이 내부적으로 서블릿으로 바뀜
1. index.html 만들기
- 시작페이지
<!DOCTYPE html>
<html>
<head>
<meta charset="UTF-8">
<title>Insert title here</title>
</head>
<body>
<p>
여기는 일반적인 시작메뉴에 해당하는 부분을 만듭니다.
</p>
<p>
회원 등록폼을 요청하는 링크주소 메뉴를 하나 만듭니다.
</p>
<a href="form.html">회원등록 양식(form) 요청</a>

</body>
</html>
2. form.html 만들기
- 체크박스는 배열로 보냄
<!DOCTYPE html>
<html>
<head>
<meta charset="UTF-8">
<title>Insert title here</title>
</head>
<body>
	<form action="form_process.jsp" method="post">
		이름 : <input type="text" name="name" size="10" /> <br />
		아이디 : <input type="text" name="id" size="10" /> <br />
		비밀번호 : <input type="password" name="pw" size="10" /> <br />

		취미 :
			<input type="checkbox" name="hobby" value="read" />독서
			<input type="checkbox" name="hobby" value="cook" />요리
			<input type="checkbox" name="hobby" value="run" />조깅
			<input type="checkbox" name="hobby" value="swim" />수영
			<input type="checkbox" name="hobby" value="sleep" />취침 <br />

		전공 :
			<input type="radio" name="major" value="kor" />국어
			<input type="radio" name="major" value="eng" />영어
			<input type="radio" name="major" value="math" />수학
			<input type="radio" name="major" value="des" />디자인 <br />

		<input type="submit" value="전송" />
	</form>
</body>
</html>
3. form_process.jsp 만들기
<%@ page language="java" contentType="text/html; charset=UTF-8"
    pageEncoding="UTF-8"%>
<%@ page import="java.util.Arrays" %>
<!DOCTYPE html>
<html>
<head>
<meta charset="UTF-8">
<title>form.html 처리하기</title>
</head>
<body>
<%! // 자바영역
	// 전체 페이지에서 사용할 멤버변수 선언(전역변수)
	String name, id, pw, major;
	String[] hobbys;
%>

<%
	// 요청정보로부터 양식의 입력값 추출
	// 1. 양식을 읽어오는 문자코드체계 설정
	request.setCharacterEncoding("UTF-8");
	// 2. 양식의 키 변수이름으로 값 추출
	name = request.getParameter("name");
	id = request.getParameter("id");
	pw = request.getParameter("pw");
	major = request.getParameter("major");
	// 요청정보로부터 배열을 가져올 경우
	hobbys = request.getParameterValues("hobby");

%>

<% // 공부연습이므로 데이터처리(=서비스=비즈니스로직)는 단순한 값 화면 출력 %>
	이름 : <%= name %><br />
	아이디 : <%= id %><br />
	비밀번호 : <%= pw %><br />
	취미 : <%= Arrays.toString(hobbys) %><br />
	전공 : <%= major %><br />


</body>
</html>
* 외부 라이브러리를 등록하여 Arrays 활용
<%@ page import="java.util.Arrays" %>
-> 서블릿의 역할


▷책 정보입력 폼 만들기
웹브라우저(클라이언트)
1. index.jsp
- 시작페이지
<%@ page language="java" contentType="text/html; charset=UTF-8"
    pageEncoding="UTF-8"%>
<!DOCTYPE html>
<html>
<head>
<meta charset="UTF-8">
<title>Insert title here</title>
</head>
<body>
<a href = "bookinfo_input.jsp">책 정보 입력</a>
</body>
</html>
2. book inpo_input.jsp
- 폼 내용
<form action="bookinfo_process.jsp" method="GET">
<%@ page language="java" contentType="text/html; charset=UTF-8"
pageEncoding="UTF-8"%>
<!DOCTYPE html>
<html>
<head>
<meta charset="UTF-8">
<title>Insert title here</title>
</head>
<body>
<form action="bookinfo_process.jsp" method="get">
책 제목 <input type="text" name="book_title" value="" /><br />
책 저자 <input type="text" name="book_author" value="" /><br />
출판사 <input type="text" name="book_publisher" value="" /><br />
책 가격 <input type="text" name="book_price" value="" /><br />
<input type="submit" value="보내기">
</form>
</body>
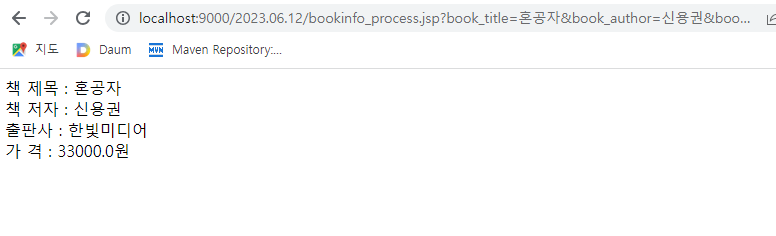
</html>3. bookinfo_process.jsp
- 데이터 처리
* 부가세 10% 포함된 가격으로 처리
- 부가세 포함된 가격을 변수로 추가하기
- 입력받은 숫자는 문자열이므로 숫자로 변경해주어야함
book_price = Integer.parseInt(request.getParameter("book_price"));<%@ page language="java" contentType="text/html; charset=UTF-8"
pageEncoding="UTF-8"%>
<!DOCTYPE html>
<html>
<head>
<meta charset="UTF-8">
<title>Insert title here</title>
</head>
<body>
<%
String book_title, book_author, book_publisher;
int book_price;
double vat_price;
%>
<%
request.setCharacterEncoding("UTF-8");
book_title = request.getParameter("book_title");
book_author = request.getParameter("book_author");
book_publisher = request.getParameter("book_publisher");
book_price = Integer.parseInt(request.getParameter("book_price"));
vat_price = book_price * 1.1;
%>
책 제목 : <%= book_title %><br />
책 저자 : <%= book_author %><br />
출판사 : <%= book_publisher %><br />
가 격 : <%= vat_price + "원"%><br />
</body>
</html>
◎ response객체와 메소드
○ sendRedirect
- 중간페이지로 이동을 하지않고 바로 지정 페이지 이동
▶ 실습
※ jsp 파일 만들기
* response1
- 간단한 데이터 입력 폼
<%@ page language="java" contentType="text/html; charset=UTF-8"
    pageEncoding="UTF-8"%>
<!DOCTYPE html>
<html>
<head>
<meta charset="UTF-8">
<title>Insert title here</title>
</head>
<body>
	<form action="response2.jsp" method="get">
		당신의 나이는 : <input type="text" name="age" size="5" />
		<input type="submit" value="보내기" />
	</form>

</body>
</html>
* response2
- action : 폼 입력 내용을 처리하는 스크립트
- 조건문을 활용하여 조건에 맞게 sendRedirect 시키기
<%@ page language="java" contentType="text/html; charset=UTF-8"
    pageEncoding="UTF-8"%>
<!DOCTYPE html>
<html>
<head>
<meta charset="UTF-8">
<title>Insert title here</title>
</head>
<body>
<%
	// 앞의 데이터 내용을 비즈니스 로직에 의해 처리하는 스크립트
	// age요소의 저장값을 가져와라
	String str = request.getParameter("age");
	// age는 숫자의 값이라 강제 형변환이 필요
	int age = Integer.parseInt(str);

	if(age >= 20) {
		//response.sendRedirect("yes.jsp?age=" + age);
		out.println("<a href='yes.jsp?age='>성년입니다.</>");
	} else {
		//response.sendRedirect("no.jsp?age=" + age);
		out.println("<a href=\"no.jsp?age=" + age + "\"");
	}
%>

현재 입력하신 나이는 <%= age %>입니다.

</body>
</html>
* yes
<%@ page language="java" contentType="text/html; charset=UTF-8"
    pageEncoding="UTF-8"%>
<!DOCTYPE html>
<html>
<head>
<meta charset="UTF-8">
<title>Insert title here</title>
</head>
<body>
	성인입니다.
	<a href="response1.jsp">처음으로 이동</a>
</body>
</html>
* no
<%@ page language="java" contentType="text/html; charset=UTF-8"
    pageEncoding="UTF-8"%>
<!DOCTYPE html>
<html>
<head>
<meta charset="UTF-8">
<title>Insert title here</title>
</head>
<body>
	미성년자입니다.
	<a href="response1.jsp">처음으로 이동</a>

</body>
</html>
-> response1을 실행하여 입력한 값에 따라 response2에서 조건문을 거쳐 조건문에 맞는 jsp화면으로 sendRedirect 됨
*(참고) 처리부 / 출력부(양식입력부) - 뷰(DOCTYPE)
처리부는 추후에 서블릿으로 빠져나옴 - 순수코드 부분
● 쿠키
- 웹 브라우저에서 서버로 어떤 데이터를 요청하면 서버에서 알맞는 로직을 수행 후 데이터를 웹브라우저에 응답해줌
- 응답이 완료되면 서버는 웹브라우저와 통신을 끊음
- http프로토콜의 특징 : 웹브라우저에 응답후 통신을 끊음
- 연결이 끊켜도 정보를 지속적으로 유지하기 위해 쿠키를 생성하여 사용
- 쿠키는 서버에서 생성하여 클라이언트로 보냄(스트림) - response 객체로 보냄
- 기본적으로 서로 다른 도메인은 쿠키를 읽을 수 없지만 읽어지는 곳이 있기 때문에 암호화 필수
* 쿠키 필수 구성요소
- 데이터와 만료시간
* 실제 중요한 부분은 세션에서 하기
세션은 용량제한이 없음
▶ 실습
* jsp에서 쿠키 생성하는 법
▷ cookieset.jsp - 쿠키 만들기
- 쿠키 객체 생성하기
Cookie cookie = new Cookie("cookieName", "cookieValue");
cookie.setMaxAge(60 * 10); // 유지시간 정하기
response.addCookie(cookie); // 만들어진 쿠키객체를 응답객체에 저장
<%@ page language="java" contentType="text/html; charset=UTF-8"
pageEncoding="UTF-8"%>
<%
/// 처리영역
// 쿠키생성
// 1. 서버에서 쿠키생성
// = 쿠키는 정보를 가르키는 변수(='key') 키에 저장된 데이터('value')의 쌍으로 이루어짐
// 2. response객체에 추가(addCookie(생성된 쿠키 객체))
// 쿠키의 내용
Cookie cookie = new Cookie("cookieName", "cookieValue");
// 쿠키의 유지시간 = 초 * 분
cookie.setMaxAge(60 * 10); // 60초 * 10분
response.addCookie(cookie); // 만들어진 쿠키객체를 응답객체에 저장
// 응답객체가 웹클라이언트로 가게되면 웹브라우저 쿠키저장공간에 파일이 만들어짐
%>
<!DOCTYPE html>
<html>
<head>
<meta charset="UTF-8">
<title>Insert title here</title>
</head>
<body>
<%-- 위에서 생성한 쿠키의 내용 읽어오는 스크립트 링크 연결 --%>
<a href="cookieget.jsp">쿠키 읽어오기</a>
</body>
</html>
▷ cookieget.jsp - 쿠키 읽기
* request를 이용하여 쿠키를 요청
- 받아온 쿠키를 출력하기 위해 for문 사용(배열이기 때문에)
- if문을 통해 str에 저장되어 있는 쿠키의 이름과 비교하여 출력
<%@ page language="java" contentType="text/html; charset=UTF-8"
    pageEncoding="UTF-8"%>
    <%
    	// 쿠키를 읽어오는 처리
    	Cookie[] cookies = request.getCookies();

    	// 위 쿠키배열에서 특정쿠키
		for (int i = 0; i < cookies.length; i++) {
			// i번째 쿠키의 key 이름을 가져오세요
			String str = cookies[i].getName();
			// i번째 쿠키의 key 이름을 비교값과 비교(예: 비밀번호 또는 암호)

			if(str.equals("cookieName")) {
				out.println("쿠키[" + i + "] name : " + cookies[i].getName());
				out.println(
					"쿠키[" + i + "] value : " + cookies[i].getValue());
				out.println("=========================================");

			}

		}

    %>
<!DOCTYPE html>
<html>
<head>
<meta charset="UTF-8">
<title>Insert title here</title>
</head>
<body>
 	<a href="cookiedelete.jsp">cookie 삭제하기</a>
</body>
</html>
▷ cookiedelete.jsp - 쿠키 삭제하기
- 우선 현재 요청객체의 모든 쿠키 읽어오
- 만료타임의 시간을 0으로 설정
-> setMaxAge(0)
- 삭제된(만료설정된) 쿠키를 다시 응답객체에 추가변경하여 클라이언트에 보내기
-> addCookie 이용
<%@ page language="java" contentType="text/html; charset=UTF-8"
    pageEncoding="UTF-8"%>

<!DOCTYPE html>
<html>
<head>
<meta charset="UTF-8">
<title>Insert title here</title>
</head>
<body>
<%
	// 쿠키 삭제 구현 - 쿠키의 만료시간을 0초로 설정하면 삭제와 같은 효과
	// 현재 요청객체의 모든 쿠키 읽기
	Cookie[] cookies = request.getCookies();
	for(int i = 0; i < cookies.length; i++) {
		// 원하는 쿠키만 삭제
		String str = cookies[i].getName(); // 키를 읽어야 키의 값을 얻어옴
		// 실제 삭제할 쿠키의 키 값인지 비교
		if(str.equals("cookieName")) {
			// 쿠키를 삭제하겠습니다.
			// 삭제하기 전에 쿠키 내용 출력
			out.println("쿠키의 이름 : " + cookies[i].getName() + "<br />");
			// 쿠키를 삭제하기위해 쿠키의 만료시간을 0으로 설정
			cookies[i].setMaxAge(0);
			// 삭제된(만료설정된) 쿠키를 다시 응답객체에 추가변경하여 클라이언트에 보내기
			response.addCookie(cookies[i]);
		}
	}
%>

<a href="cookieset.jsp">쿠키확인</a>
</body>
</html>
▷ cookietest.jsp - 쿠키 테스트하기
-> 실행
<%@ page language="java" contentType="text/html; charset=UTF-8"
    pageEncoding="UTF-8"%>

<%
	Cookie[] cookies = request.getCookies();

	for (int i = 0; i < cookies.length; i++) {
		out.println(
			"cookies[" + i + "] name : " + cookies[i].getName());
		out.println(
			"cookies[" + i + "] value : " + cookies[i].getValue());

	}
%>

<!DOCTYPE html>
<html>
<head>
<meta charset="UTF-8">
<title>Insert title here</title>
</head>
<body>
	<br />
	<a href="cookieset.jsp">쿠키 만들기</a><br />
	<a href="cookieget.jsp">쿠키 가져오기</a><br />
	<a href="cookiedelete.jsp">쿠키 삭제</a><br />
</body>
</html>
* 세션 : 서버와 클라이언트에 저장된 일련기록
-> 내가 만든 것이 아님

* (참고)500에러가 발생하면 개발툴(sts)에도 확인이 됨 - 클라이언트에게는 안보이게 끄기
- set에서 객체를 생성할때 이름을 한글로 작성하면 예약된 툴이라는 에러가 발생할 수 있음
* new로 객체생성 - response에 담는다(추가한다addcookie) - 응답을 반환함(웹브라우저에 보내짐) - 특정 장소에 보관)
(햄버거 > 도구 더보기 > 개발자도구에서 확인)


- 쿠키를 삭제하면 사라짐
▶ 쿠키를 이용한 로그인
- 웹은 요청을 시행하면 연결이 끊어지는 특성을 가지고 있어 기록을 쿠키로 남겨두어 로그인에 활용
* 로그인창, 로그인 판단스크립트, 로그인 상태의 회원페이지, 로그아웃 상태의 시작페이지 필요
▷ login.jsp - 로그인 화면
- 로그인 폼 만들기
- action 위치 : loginGo.jsp
<%@ page language="java" contentType="text/html; charset=UTF-8"
    pageEncoding="UTF-8"%>
<!DOCTYPE html>
<html>
<head>
<meta charset="UTF-8">
<title>로그인 창</title>
</head>
<body>
	<form action="loginGo.jsp" method="post">
		아이디 : <input type="text" name="id" size="10" /> <br />
		비밀번호 : <input type="password" name="pw" size="10" /><br />
		<input type="submit" value="로그인" />
	</form>
</body>
</html>
▷ loginGo.jsp - 로그인 처리
- html은 필요없음
- 폼을 통해 입력한 아이디와 비밀번호를 request.getParameter를 통해 요청
- if문을 활용해 아이디와 비밀번호는 동시에 비교함 (논리곱, 교집합 활용)
- 로그인이 성공한다면 로그인 정보가 담긴 쿠키가 생성됨
-> response.sendRedirect를 활용하여 "login_home.jsp" 로 보냄
<%@ page language="java" contentType="text/html; charset=UTF-8"
    pageEncoding="UTF-8"%>
<%!
	// 이 페이지에서 사용할 전역변수 선언(멤버 변수, 멤버 메소드)
	String id, pw;
%>

<%
	id = request.getParameter("id");
	pw = request.getParameter("pw");

	// "abcde", "12345" 디비에 등록된 정보로 가정
	// if : 로그인 성공 => 사용자 화면으로 이동
	// else : 로그인 실패 => 로그인 화면으로 이동
	if (id.equals("abcde") &&
		pw.equals("12345")) {
		// 로그인 성공으로 쿠키를 만들고 사용자 화면으로 이동(키, 값)
		Cookie cookie = new Cookie("id", id);
		// 쿠키 유지시간
		cookie.setMaxAge(60);
		// 응답객체로 응답
		response.addCookie(cookie);
		response.sendRedirect("login_home.jsp"); // 로그인 성공이므로 사용자페이지
	} else {
		response.sendRedirect("login.jsp");
	}

%>
<!DOCTYPE html>
<html>
<head>
<meta charset="UTF-8">
<title>로그인 처리</title>
</head>
<body>

</body>
</html>
▷ login_home.jsp - 로그인상태의 회원페이지
-> 로그아웃 버튼
- request.getCookies()를 통해 쿠키 가져오기
- for문을 활용해 값 저장
- if문으로 동일한 아이디라면 로그인 성공
<%@ page language="java" contentType="text/html; charset=UTF-8"
    pageEncoding="UTF-8"%>

<%
	// 로그인 유저만 들어올 수 있도록 보안 기능 구현 필요
	// 지금은 간단하게 하기위해 차후 추가
	// 웹브라우저의 쿠키정보를 모두 가져옴
	Cookie[] cookies = request.getCookies();

	// 지금은 로그인성공화면 구현이므로 로그인 정보화면 출력
	for (int i = 0; i < cookies.length; i++) {
		String id = cookies[i].getValue();

		if (id.equals("abcde")) {
			out.println(id + "님 안녕하세요." + "<br />");
		}
	}

%>

<!DOCTYPE html>
<html>
<head>
<meta charset="UTF-8">
<title>Insert title here</title>
</head>
<body>

	<a href="logout.jsp">로그아웃</a>
</body>
</html>
▷ logout.jsp - 로그아웃
<%@ page language="java" contentType="text/html; charset=UTF-8"
    pageEncoding="UTF-8"%>

<%
	// 모든 쿠키 가져오기
	Cookie[] cookies = request.getCookies();

	// 쿠키가 == null인 경우 쿠키로 만든 내용이 없음
	if (cookies != null) {
		for (int i = 0; i < cookies.length; i++) {
			if (cookies[i].getValue().equals("abcde")) {
				cookies[i].setMaxAge(0);
				response.addCookie(cookies[i]);
			}
		}
	}

	// 로그아웃 했으므로 시작페이지(=login.jsp)로 자동이동
	response.sendRedirect("login.jsp");
%>
<!DOCTYPE html>
<html>
<head>
<meta charset="UTF-8">
<title>Insert title here</title>
</head>
<body>

</body>
</html>
* login.jsp
입력화면 : 사다리꼴
아이디, 비밀번호 입력
* loginGo.jsp
마름모꼴
id와 pw가 일치하면 login_home.jsp 이동 login_home.jsp에서 로그아웃 누르면 logout.jsp실행 logout.jsp은 login.jsp 실행(돌아감)
'백엔드 > JSP & Servlet' 카테고리의 다른 글
| JSP - 4 (세션 + 네트워크) (0) | 2023.06.19 |
|---|---|
| JSP / Servlet - 2(기초) (2) | 2023.06.14 |
| JSP / Servlet - 1 (기초) + 네트워크 (0) | 2023.06.13 |
| JSP / Servlet - 0 (아파치 톰캣 설치) (0) | 2023.06.13 |


